


Shooting a wedding for ten hours inevitably means that you go home with a massive number of images. Thanks to memory cards with huge capacities, I’m able to document every single part of the day and feel confident that I’ve not missed a thing. When I see a special moment occurring, I will usually fire off a series of shots to make sure that I get the perfect frame, just in case something unplanned happens, such as jumping focus or someone blinking.
A lot of people don’t realize that the most time-consuming part of wedding photography is the editing process. On average, I usually end up with 3000+ images from the day, a lot of which are throwaway duplicates. Sorting through these images used to be such a painstaking job for me, and something I never looked forward to. I would import all of my images from the day straight into Lightroom and have the software 1:1 render all of the images – enabling multiple previews – a slow process that really hindered my workflow.
Don’t get me wrong, 1:1 rendering is great if you’re dealing with a small number of images, but shooting a wedding at least once a week throughout the season requires something quicker. I needed a way of selecting images before importing to Lightroom and having to render individually; this is where Photo Mechanic 6 comes in. It’s an amazing piece of software that works seamlessly with Lightroom, and is designed to speed up that painful import selection process that all photographers dread. It enables fast viewing of your images, allowing you to rate and cull your selection with ease.
The newest version of the software actually claims to be three times faster than previous versions, making it an even better reason to introduce this into your working life. If you’re really brave, you can now copy only the images you need from your memory card to your hard drive.
The Lightroom process using Photo Mechanic 6 is super simple and took me no time at all to learn. In a few steps, I’ll show you just how easy it is to use.
Step 1:
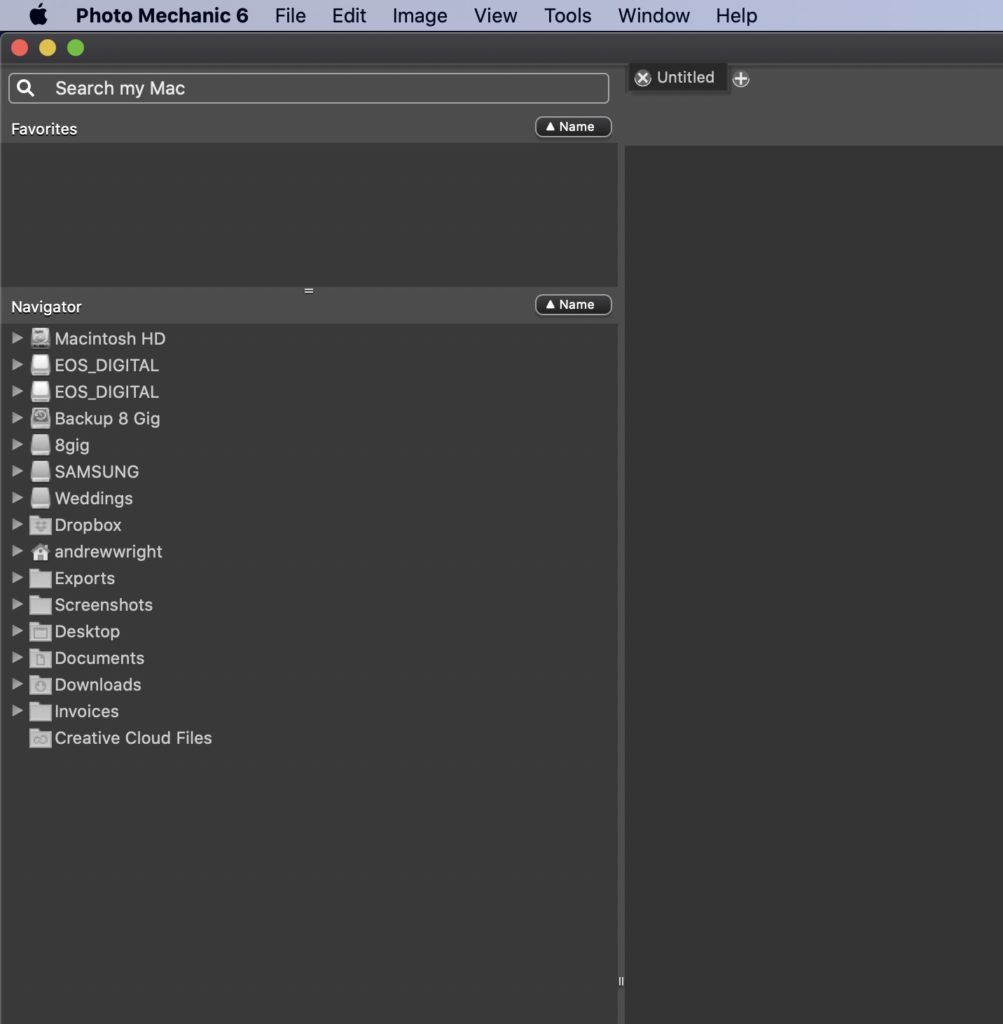
After installing Photo Mechanic 6 and opening the software, find your memory card that is already plugged into your computer from within the platform; in this case, it’s ‘EOS_DIGITAL.’ This will pull up all of the images that are currently sitting on your memory card.
Step 2:
You’re now straight into the selecting and culling process without any slow loading times or rendering. Due to Photo Mechanic 6 having a lot fewer functions than Lightroom, it allows you to view and star images a lot quicker. The load time is minimal which massively speeds up this part of your workflow. The thumbnails are also quite large, so you get a good idea of how each image looks without having to enlarge every time. Alternatively, if you wanted to view each image full screen, then you can.
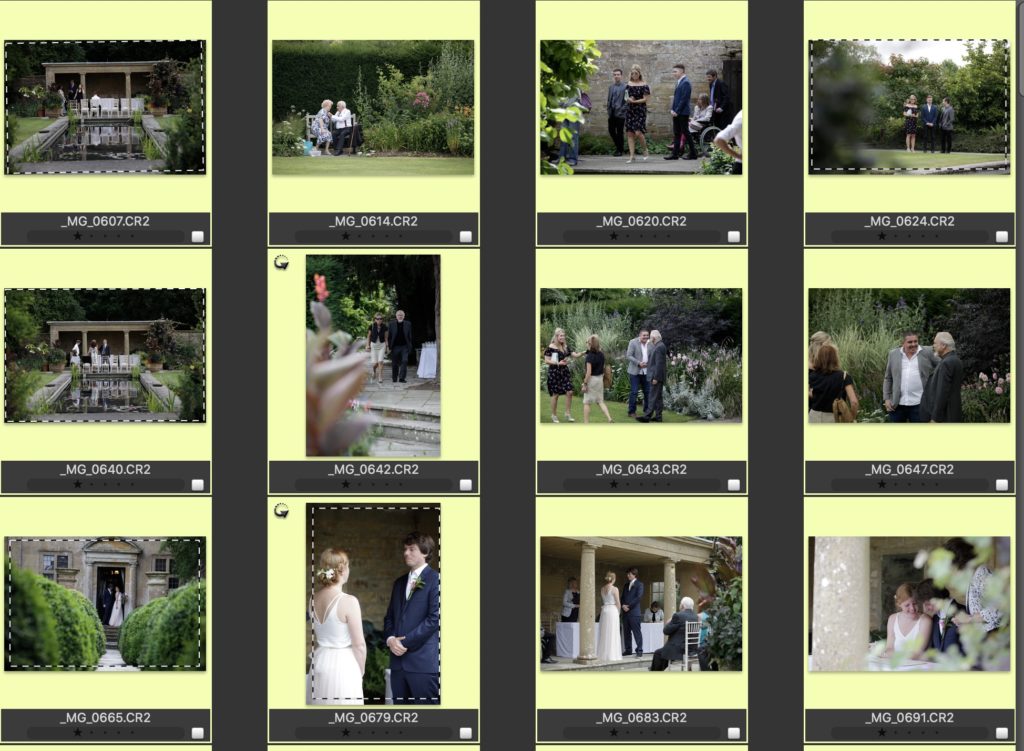
Personally, I like to double click on the first image, which opens it up in a bigger preview box, then use the arrow keys to cycle through the images and one-star all the ones I want to keep. You can select between one and five stars, so it’s worth deciding on a rating that works for you. For example, one-star for me is a keeper, and 3-stars is a maybe, which I can review again after the first round of selection.
Top tip – edit your images out, not down. In other words, pick the ones you like, not delete the ones you don’t. When you’re going through a large range of photos, this is a quicker method for achieving your final selection.
So now you have been through all of your images and have one-starred the ones that you would like to keep, your grid will look something like this:
Notice the small one-star icons below each photo that you have chosen.
Step 3:
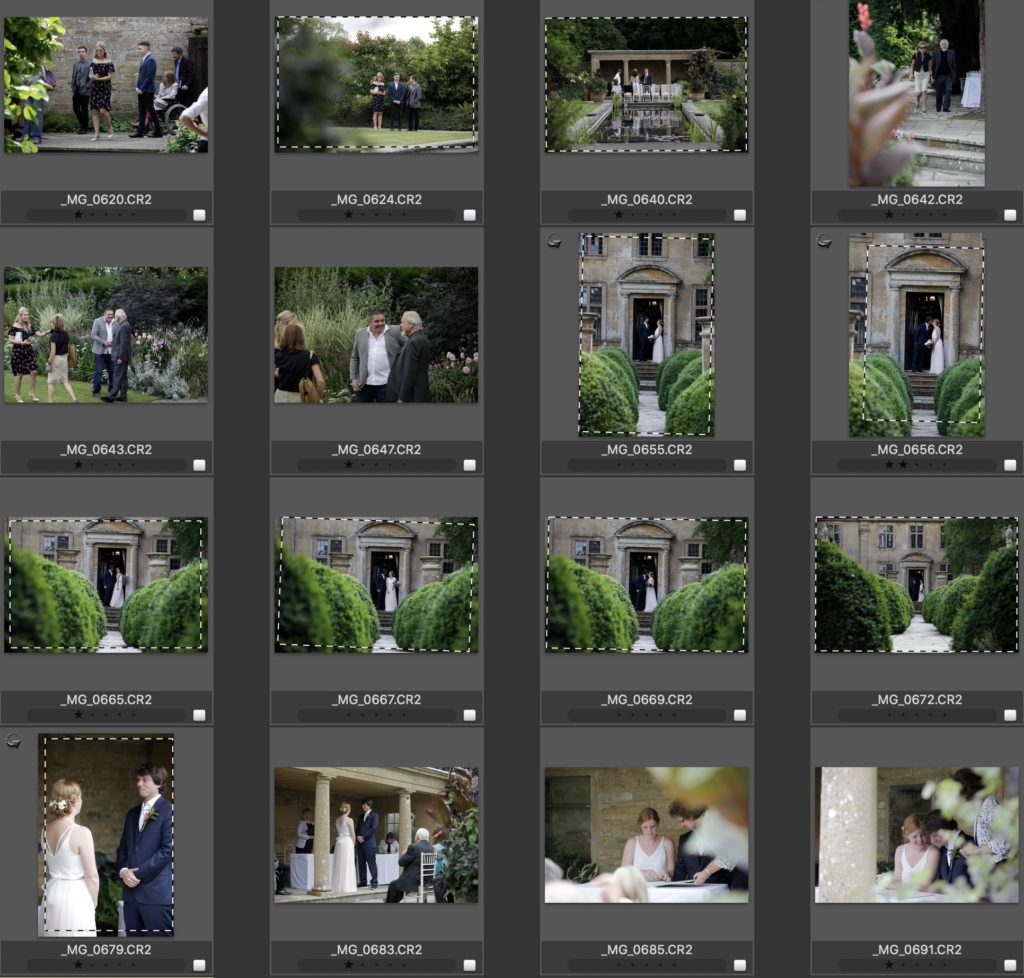
We now need to filter just the one-starred photographs ready for import. To do this, hold down the option key on a mac and click on the 1-star icon. This will remove all other stars apart from the one-star, leaving you with your chosen selection.

The new Photo Mechanic 6 interface is a lot more user-friendly than previous versions of the software, and they’ve even added a few more features to help speed up your workflow. The enhanced crop tool allows you to draw your crop as needed, and also rotate the selection, using a handy grid display, to line up things such as a crooked horizon.
Step 4:
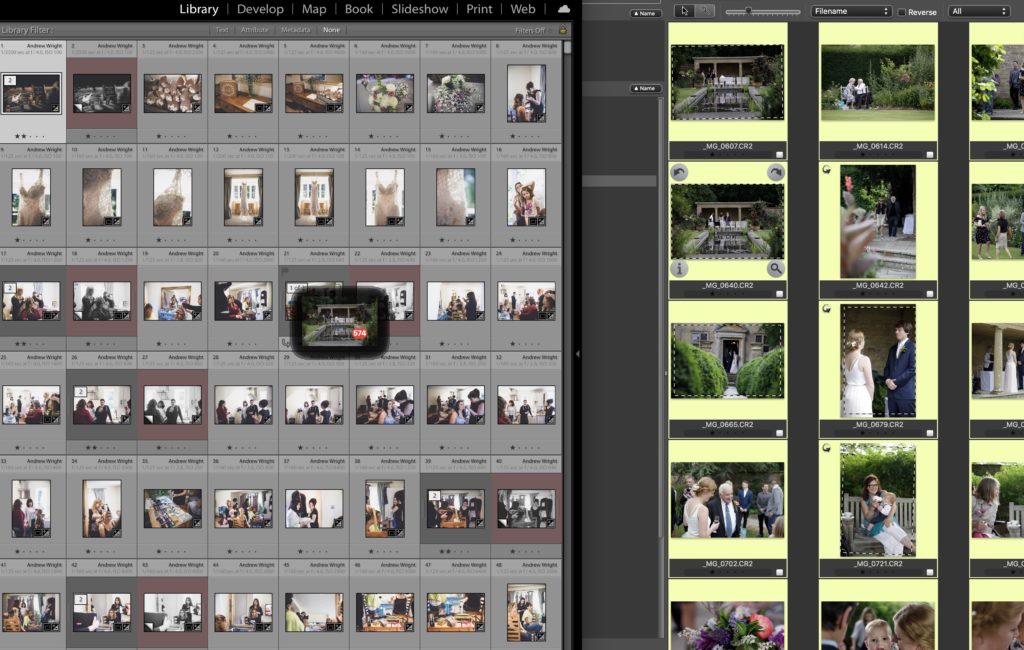
Now we’re nearly there. Open up Lightroom, if it is not already, and have it sitting next to Photo Mechanic on your screen. This is so you can easily drag and drop the new images into Lightroom. Once they are selected in Photo Mechanic, drag and drop them into the grid view of Lightroom. Don’t try and put them into a folder directly, as it will not work.
By doing this, it will open up the import dialog box that you are familiar with, displaying images from your memory card. Amazingly, only the preselected 1-starred photos will be checked.
Now it’s over to you to select the new destination folder for your selected images within your Lightroom catalog and you’re good to go! And from this moment, you can get straight into the editing process with a refined selection of images that you already know you want to work on.
Conclusion
So, to summarise, not only does Photo Mechanic 6 speed up your selection process, but it enables you to get your head in the zone once you start editing. No more stop-start productivity!
How To Speed Up Your Workflow in Lightroom with Photo Mechanic 6
